September 30, 2009

Goodies for your goblins!

Well now. I've been away for quite some time. Not without reason. I've been videoing out the wazoo. Now the editing begins (which takes the most time).

I have something really fun to share. A fun little project for anyone needing some treat bags, Fall style. These bags were kind of geared toward 'kiddie' treats. You can of course use them for whatever you want. Think about stuffing them with bags of popcorn (you know, the ones in the cellophane; prepackaged), or Cocoa packs. Ooooooo many options.

They were SUPER easy to make (really). Here are your supplies:


  • Brown paper bag

  • Rubber stamps and ink (here I used Baroque Motifs and Chocolate Chip)

  • Wide oval punch

  • Card stock (really, whatever colors you want).

  • Embellishments

  • Stapler

  • Eyelet border punch


Now, there are several ways to do this. Basically, fold up the base of your paper bag and staple the side to hold it together. The staples on my bag are underneath the decorative Chocolate Chip eyelet border. I also used the same punch on the top of the bag. It really adds a little bit more whimsy.

Stamp your flourish in ink over the bag. Add orange flowers using Pumpkin ink (this flower is also from the Baroque set). Punch three wide ovals using the "wide" oval punch of course (really, any oval punch would look great); sponge the edges and adhere.

Place 5/8" green grosgrain ribbon under the pumpkin top using a glue dot.

Use your 1/2" circle punch and make two holes in the top of the bag (this is where you'll attach that striped pumpkin ribbon). Below is what the holes look like and the length of ribbon I used for the bag (notice it's the length of your bag from top to bottom)?


Now, I've added that corduroy brad (SU!), BUT, if you're giving these to kids, I might suggest you skip that (b/c we ALL KNOW it's gonna wind up in the garage). Unless of course it's going to one of MY kids....they would save it b/c they KNOW mom saves ALLLLLLLLLL, lol!!!

OK...there you have it! I want to see some creative bags you guys. After I've finished my chicken and sausage jambalaya, I'm going to make some more of these with different embellishments. That'll get your creative juices flowing.

September 22, 2009

O Christmas Tree Pop-Up tutorial

OK, so I'm a little late in the day with the tutorial, but here it is. It was tweaked for two days(YEP...TWO DAYS). I wanted to make sure I covered what was needed to assemble your own. It really is easy (and fun).

It's 8 minutes long so, grab a soda and enjoy!


September 19, 2009

Tour de Freaks ~ September

This month we were called to design something relating to Fall/Halloween/Thanksgiving. I LOVE the Fall so this was right up my alley. We have some awesome projects lined up so make sure you check them all. If you've already been viewing the tour, you've arrived here from the previous blog, Julie Dinn.

First up, a festive fall card. There are so many beautiful Earth Element colors, it's hard to choose which to use when designing for fall. Luckily I was able to narrow it down. The flower cut-outs shown here are from the Birds and Blooms sizzlets. The bold leaves are from the Best Wishes and More stamp set I received last year at regionals. Select colors were Dusty Durango, Chocolate Chip and Taken with Teal.


Next up, is my Woodland tree scape. The new O Christmas Tree pop-up die in the Holiday Mini is all the rage! There are countless tree theme possibilities, Valentine, Halloween, what about Easter?

I've created a how-to video for assembling the tree, but you'll have to wait till Tuesday to view it. Until then, here are a few key parts needed for creating my little forest scene below.

Start off with a sheet of Really Rust card stock, run it through your O Christmas tree die and stamp the edges with the tree image from the Forest Friends stamp set. The animals are all from the Forest Friends stamp set as well. The base of this 5 1/2" x 5 1/2" card is Soft Suede, covered by a sheet of Autumn Meadows DSP (as well as the background paper in the image).


Here's a close-up of the tree. You can see the chocoloate chip leaves and branches stamped with the "tree image" from the Forest Friends stamp set. The gold glitz around the edges of the tree and the oval is the new Champagne Shimmer Paint by SU!. It goes on like a glaze, very thin but with BIG impact. I like it most because it goes on translucent, allowing you to see the images below the paint. Remember, this is an acrylic paint, so if using it directly on your stamp, you'll want to wash it immediately.


Lastly, a decorative hostess gift. I picked up these beautifully Autumn gold candles from the craft store knowing they'd make a great gift once jazzed up a bit. Once again, the Birds and Blooms sizzlets were incorporated here in addition to the new Autumn Meadows DSP featured in the 2009 SU! Holiday Mini.


Here's a close-up of the flowers looking from both sides of the handle.


There you have it. I hope you've enjoyed my projects. Remember, if you'd like to see the video on how to assembly the die-cut tree, it will be available Tuesday.

Time to hop over to the next blog. Select the image below and it will take you to the fabulous Connie Babbert. Enjoy the rest of your hop! See you next month on the 20th!


September 17, 2009

Ethereal Sketching

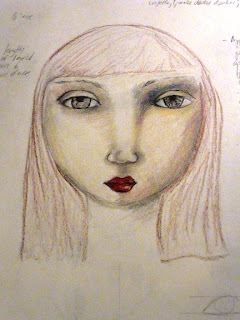
I've been working on some sketches. The drawings are supposed to depict ethereal images, although sometimes the stroke of my pencil takes me in another direction completely. It's all a matter of going with the flow, and letting it....just happen.

These have yet to be colored in, coll aged and embellished. They are resting now. I'm waiting for them to speak to me so I'll know where to go from. Many of you know what I'm talking about. Setting a project to the side for a day or so is all you need to get a fresh perspective on it.


September 11, 2009

Countdown to Halloween

Here it is! My Countdown to Halloween magnetic calendar. Each date was hand-stamped or embellished with a Halloween image. All dates with a 'number' are adhered to the actual tin (securely). The images all have magnets on the back so you can move them around (what's the point of making something fun like this if you can't move things about)?

So, what's all involved in making this? Well, all the products shown here (images) are Stampin' Up! Some of the sets are retired, but hey, I'm not going to let my old stamp sets just sit around and do nothing with them.

While there are many images on the tin, there are two MUST-have products that you need. The Cast a Spell designer paper and Spooky Treats rub-ons. If you're looking for other fun Halloween sets, be sure to check out Batty for You and From the Crypt .

These products are available on my demo website.


A close-up.


September 9, 2009

Halloween Countdown Calendar

Who's a fan of Halloween, Halloween, Halloween? It is one of my FAVORITE Holidays.

I've been working on something extra special! While I'm dying to share with you, it'll have to wait until I finish writing up all the class details. Until then, enjoy this sneakity peekity:


September 7, 2009

Blog Swap ~ My Musings

A few weeks ago I signed up for a blog swap. The purpose of course is to share my the link to my partners blog with my readers and vice versa. It's a great way to learn about a blog that you may not have know existed, thus opening your eyes to the vastness of this great big Blogoshpere we reside in.

My swapping partner is Pushpa and her blog is My Musings. Pushpa and I were paired as 'creative' sources. While I create with paper, Pushpa creates with words. You see, Pushpa is a poet. She writes 3 - 4 poems a week!

Here's a bit more background on Pushpa (only a 'few' notes, you can read more in her bio on her blog). She is from India and has a post graduate degree in Special Education. She taught international English in 1982 for 3 years in Parimaribo. She has written 2 books on computers for children and a set of 24 modules in Mathematics. Pushpa also has an inspirational story published in Chicken Soup for the souls.

Here is a sample of a recent poem:

Sometimes

Poetry can paint true feelings
Even when laced with random thoughts
Colors, designs, shapes inter-locked
Captured inside an intricate prints

The eye within sees the colorful shades
With different hues at titled angles
Thoughts mingle with greater ease when
Words emerge refreshed from painted canvas

They jump off easel with renewed verses
Unlocking rhythm of compressed thoughts
Colors, design, shapes, unzipped
Poetry jumps to express the feelings.

If you'd like to read more of Pushpa's poems, be sure to check out her blog: My Musings.

It's amazing being able to learn about someone who lives clear across the other side of the world. We forget how big the Internet is and it's capabilities.

I hope you visit Pushpa's blog and stop by to tell her "Hi". She's got a wonderful, kind spirit!

Thanks Pushpa for being my blog swap partner.

September 4, 2009

Seasonal Smiley's Online Workshop


Seasonal Smiley's and Gift Packages
Online Video Workshop
November 17th


It's the time of year to start thinking of ideas for your holiday gift list.  How'd you like to get your list narrowed down and feel great knowing YOU created it and saved money doing so?

This online video workshop features ideas to create inexpensive and personalized gifts.  These small, gift-giving items (often referred to as Smiley's) are prefect for co-workers, neighbors and those you'd like to 'give a little something to".  Registered members view videos directly from the source, or download them for future reference.

Be one of the first 50 to register and you're automatically entered in a drawing for a $50 Stampin' Up! gift certificate, compliments of PocketsofInspiration.NING

Each 'smiley' includes a cooridnating gift package for presentation, (because gifts look so much lovlier when they coordinate with their pacakges).  Below is list of projects included in this online workshop:

  • Captured Butterfly glass ornament with gift box
  • Extreme Elements notecards with personalized stoarge box
  • Sweet Treats Holiday Goodie Box (the perfect package for those home-made cookies)
  • Collage glass charm that doubles as a book mark

Seasonal Smiley's and Gift Packages
Online Workshop
November 17th

Cost $27.00


Sign up at PocketsofInspiration.NING.com 

Once you're in, I'll send you a complimentary video tutorial of "Matchbox Memories" to for a test drive of my online videos.

September 1, 2009

DaRubbaBlock DT September Sampler

I've joined forces with my downline to create monthly projects featuring current Stampin' Up! products. Each sampler offers complete 'how-to' instructions and is released the 1st of each month. If you'd like to receive future issues of the DaRubbaBlock Design Team samplers, simply "Sign Up for Inspiration" box up in the top left corner of the blog.

This month the focus was on the Holiday Mini. Here's the September samples. Enjoy!