December 24, 2008

Snowy Louisiana

Thought I'd share my Christmas Card this year. I decided to make these notecards using one of the images I took from our rare Southern Louisiana snow day. Snapfish had a special on notecards.

When the cards arrived they didn't look nearly as impressive compared to the actual day they were taken. A last minute decision to embellish them with my Baroque Motif stamp set and black Staz-on ink proved to be very successful. Even the husband agreed!

The cards are more black and white than what you see here. This sepia color (which I think looks even better) is a result of not using the flash on my camera while taking the photo.

So, here it is, my "Merry Christmas" to all of you! Have a safe and blessed Holiday.

December 23, 2008

Baking, Mel's way

I took some time this past weekend to bake a little. I dont' really have the pateince any more to do much baking, unless it's quick and painless.

I'd be more than happy to share the recipes with you, but don't count on me to tell you what goes in the bowl. The recipes were useless to me really being that I didn't follow ANY of them correctly. That's what I get for rushing.

Let's start with the "No Bake" Orange Cookie Balls. Here we have a box of crushed vanilla wafers, coconut, orange juice concentrate, pecans and powdered sugar all in one bowl.


Once the ingreds. are mixed, I stuck it all in a ziplock bag to get cold (b/c the recipe said so...that much I DID follow). Below is the hard cookie dough plopped on a plate.


Below I've created semi-round balls with a melon scoop (aren't I clever). These no-bake cookies are placed neatly (somewhat) on a baking sheet for placing in the oven.


I am trying to complete these cookies by memory. What the heck is this extra powder sugar for? It must be for rolling the cookies in b/c they look completely boring like they are. Let's dump the rolled cookies 5 at a time in a ziplock bag (more if you're ImPaTieNt!), shake and turn to coat them and place them back on the baking sheet.


It is just then I am realizing that these are ~ NO BAKE COOKIES. So why in the heck am I using a cookie sheet?

Hum. These sure dont' look like they used to. Wasn't there coconut on the outside of the cookie last time I made them? Oooooooooooohhhhhhhh yeahhhhhh! The extra powdered sugar was used to make a thin icing which held the COCONUT to the outside of the cookie. Oh well, it's all going down the same shoot, so who cares if the coconut is inside or oustide; it all taste the same in the end.


Now, on to Magic Cookie Bars. Yum, don't these look good?


Here's what I did: Crush graham crackers and 1/2 stick of butter; pour butter over graham crackers. Pour a can of condensed milk over this.


Add chocolate chip morsels, pecans on top.


Coconut on top of that.

Hum. It looks wrong. I think the chocolate chips and pecans were supposed to go first and then the condensed milk..then the coconut. Oh well, it's ALL going down the same way. No one will ever no!

Look at that dog waiting for us to drop something.


I made some dough the week before for Choclolate Chip Cookies. It was DISGUSTINGLY salty (I think b/c I used salted butter). I only had 1 cup of flour and was trying to make it work. Well, it didn't, so I had to get more flour and other 'things' to try and correct it. I mixed up 'stuff', put it in a ziplock and put it in the fridge till I had time to deal with baking it.

Here it is out of the ziplock ready to be made into chocolate chip cookies. UGH. This dough is really hard. I don't feel like standing here making cookies. Let's just chop it up and....

mush it in this pampered chef pan. There! All done. That was really quick!

These cookies still tasted a little salty but the men at the office eat ANYTHING!


I'm being kicked off the computer yet AGAIN! This is why I never post to my blog; competing with a husband and 3 children for computer time! Mommy wants her own computer for Christmas!

December 16, 2008

Love You Much pouch

Here's a little sneak peek of something I made for fun. They were created with the Bigz Petal Die and the new stamp set from the 'Love You Much" stamp set being released December 23rd.


December 12, 2008

More winter photos

Well, the snow lasted for only a few hours but it was fun while it did. Here are a few shots I took before I found out the office was actually open.


A fallen tree from Hurricane Gustav.


A huge live oak.


What would snow in LA be without a Mardi Gras snowman?

The farmer snowman was my fav.

December 11, 2008

It's SNOWING in Louisiana!

The kids woke me up at 5:30am (OK..I'm supposed to be up anyway) screaming in the hall with excitement because it's SNOWING!

I think the last time it snowed here was 5 years ago. Most of you in the northern states are probably rolling your eyes, but remember, here in the south we rarely get snow. We'll enjoy it before the sun comes up, before it starts to melt. Here are a few quick shots (most blurry...due to lack of coffee before taking them).


December 10, 2008

My latest creations....

Here are a few things I've been working on. What do you think of my little wine bottle apron? I think the corks make it super cute, but I have other prints waiting to be assembled that will look just as nice.

These little babies are available for $6.00 plus S&H.


Here is a singing reindeer gift bag, made entirely with punches. Thanks to Laura Lipe for the great idea. My kids LOVED this bag. Had to hide it so they wouldn't snatch it.


Last, but not least, my lovely Fleur De Lis note cards. I love this Fleur image, it's so bold. These Fleur note cards are hand-stamped on crisp white cardstock and come in a set of 10 for $12.00.


Christmas is coming waaaaaaaay to fast for me. Luckily I have a husband who has taken on the job of getting all the gifts for the kiddos. My only job is to wrap everything. Not sure I'm getting the better end of the deal.

Decorations on the house this year is very sparse, so little in fact that we have only half a length of garland covering the left side of the front door (typically I do both sides). I'll chalk it up to "busy with the kids", when I really know I'm busy with the house and trying to fit in my studio time. Never-the-less, we must move forward.

I am currently preparing for THREE large shows coming up the first 3 months of the new year. The February event is Crop Celebration. The girls have updated the website and are taking sign-ups NOW. I enjoyed myself immensely at the first annul event this past fall. The people were wonderful and it was an overall great experience. All proceeds go to the Restoration Pregnancy Center, so I'm really trying to help the girls promote it....after all, it's such a great cause.

OK. If I'm blogging it means I'm NOT creating...so, I'm off. If you're planning on heading out to parties this weekend, be careful, don't drive drunk and don't let your friends drive drunk either.

Blessings.

December 3, 2008

Darting In....

Greetings, from the monthly Blogger, LOL! Yes, I know. Busy, Busy. It's the holidays and perfectly acceptable.

Here's something I've been working on. It was created using the Serif Essentials die cut. The letters were cut out of red polka-dot fabric. LOVE it!


This beauty was stamped with the Together Forever set in Chocolate Chip and the "K" is from the Just Right Stamp Set "Special Occasions" at Croppinsville (curretnly 25% off if you order online. I made these Thank You cards for some friends who recently were wed. Aren't the colors great...and SO easy to do. Gotta love those punches!

Have a great week everyone!
Melanie

November 5, 2008

Preparing for Craft Days

Thought I'd drop in quickly and give everyone an update on what's been going on.

First off, I've been busily preparing for Mistletoe Market which is coming in just TWO WEEKS! I have many projects I've been working on till the wee hours of the night. Everything is hand-stamped in some form or the other. Here's a sneak peek of something I'm going to carry, giant book marks. Aren't these going to make great Smiley's for someone??


I've also been trying to update the Mistletoe Market website with new vendor information and all their links. They'll be a whopping 115 vendors this year. WOW! I can't wait to see everything set up. Last year I was so busy during the event I didn't have time to shop myself!


In addition to preparing for Mistletoe Market, I've been lining up some classes for the holidays. This Friday I'm attending Judson Baptist Church in Walker, LA for a monthly crop (as I mentioned in my previous post).


Add to that preparation for the holidays, my 'real' job, preparing for my sons reconciliation and keeping the kids entertained on the weekend, I've been busy. Needless to say, my coffee pot and my giant container of Folgers is getting well used.

Lastly, I wanted to share with you a giant wash basin I found at a local thrift store. It was love at first sight. Cracked and stained porcelain, the intricate detail of the images inside, just gorgeous. I plan on using it to display some of my goods at the Market. I've gotten REALLY creative when it comes to displaying items.


Isn't the detail beautiful?


OK, it's back to my Stampin' Studio (aka, my dining room turned craft room). Sadly I have filtered into my living room as well.

Stampin' Smiles.

Melanie

November 3, 2008

Upcoming class at Judson Baptist Church

Hello everyone. Popping in between my whirlwind to say "HELLO". The holiday season hit me weeks ago believe it or not and I've been going non-stop since!

I've been working on several projects at once (as usual) and I can't wait to share with you what they are, but, I'm tweaking them so you'll have to wait.

This Friday Judson Baptist Church is having their first Friday crop. I'll be there offering 3 holiday project make and takes for $10. I'll also have 1 free make and take for those who want to polish up on those stamping skills. You know, EVERYONE makes their holiday cards now-a-days so you'll want to re familiarize yourself with the "How-to's" and come see me for some great ideas!

Here's a sneak peek of one of the cards we'll be doing:


I also wanted to share with you one of the WOW projects I demoed at the Jackson, MS Stampin' Up! regional this past weekend. I had a great time seeing all my downline, sidelines and uplines.

This is a Tulipe Bigz wall hanging. Honestly, this die is not selling as fast as I thought it would. I LOVE it! Doesn't it look like a Fleur-de-lis to you? So very Southern.

It's hard to see, but the white part of the die raised with dimensionals to give it more of a 3D look.


OK, it's back to work. I have lots to take care of for the upcoming Mistletoe Market (just 2 weeks away)!

Stampin' Smiles

Melanie

October 19, 2008

Treat Box Video Tutorial

WOW! It's been almost 30 days since my last post. How about a little video tutorial to get back on track?

This video concentrates on how to create the inner pouch used to store your treats in this Frankenstien "Monster Box" (originally created by fellow demo Cambria Turnbow). Find something sturdy that can withstand a bit of pressure and fits inside of your die cut image. Simply fold the cardstock around the object like you're wrapping a gift. The advantage of using this techniques is NO measuring or scoring needed, just fold!

The Monster box It uses new Stampin' Up! Big Shot. This entire project was created using Stampin' Up! punches and the Top Note Bigz die cut. Easy Peasy! Let your imagination guide you. I've also created a little mummy box using the same technique, viewable at the end fo the video.


September 21, 2008

Creative event displays

This upcoming week I'm participating in SCRAPFEST and have been working on my booth display. I have been wanting to update my display for years but you know how time creeps up on you. So, this year I decided to buckle down and get it done.

My inspiration comes from the blogs I visit which showcase their goods creatively at large anitque shows and crafting events. Surprisingly, not many of them have to do with stamping. Remember though that inspiration comes from everywhere and many of these sites have ideas that can be easily incorporated into large events or your own home.

While I have MANY creative blogs book-marked, here are a few of my favorites.
  • Barnhouse, Vintage Home and Garden: I have to admit, I only discovered this blog a month ago. BEAUTIFUL images, great ideas. This site warms my heart.
  • Queen of Tarte: Love her blog banner and you have got to see her fabulous jumbo crepe paper flowers.
  • Curious Sofa: I discovered Debbie's site almost a year ago. Check out her awesome Halloween open house. Sooooooo creative! Be sure to scroll down far enough to see the house on the orange and black stocking covered legs.

Feeling inspired yet? I have many, many more links but my craft room awaits. Lots to do before next week and I'm pulling extra hours at the DAY JOB!

Before I go I'd like to share part of my new display with you. Tell me, what do you think?


I'm going for a "Fall/Winter" mix. I don't want it to be all Fall related, nor Christmassy, so I opted for a more natural look browns and blues (THE hottest colors). I LOVE this soft blue green silk fabric. This is the color I selected to paint our bedroom. It just so happens that this color matches the new SU! in-color Baja Breeze, the same colors I am using in the paper products. How's that for coordinating!!!

All of the products to create the banner can be purchased by selecting my "Place your roder online now" button located on my Blog Homepage. Here is a close-up of the banner along with links to close-ups of the supplies used. The new Pennant Bigz Die from SU! along with the Tulipe Bigz(LOOOOOOOOOOOOOVE it!) and the 4" Jumbo Scallop die. Jumbo brads, chocolate chip ribbon and Urban Garden designer paper. I think it came out really nice.


Here is a close-up of the center pennant. It needed more so I added additional flowers and the Baja Ribbon at the top.


The first and last pennant needed some extras also so I added the green ribbon at the top and the pewter brads at the base.


Here is a canvas I created using the Together Forever Circle Frame Decor Elements applique. It's attached to a 14 x 17 canvas that I painted in Cream acrylic. The "S" is the large monogram applique.


Well, that's it for now. I have so much to do before Wednesday when I leave for the show. If you get the chance and are in the Mandeville area, pop in to see me and get a chance to see everything up close. I'll have lots of discounted product and some retired sets (all of which will eventually be posted online). You will also get a chance to create a free Make and Take!

If I don't get to see you at Scrapfest, you can catch me next at Crop Celebration October 10Th and 11Th in Hammond, LA.

September 14, 2008

Scalloped Ornament

So, it's been two full weeks since I last posted. Not without reason. Hurricane Gustav had much to do with that (power was out for a week). We were lucky, there are still many others who are without electricity.

I took a few snapshots while out and about trying to get ice to keep in the cooler. Sadly, these photos are mild compared to some areas. I'll share them in a bit.

First, I'd like to show you something I created with one of the new SU! Bigz dies. This was the only thing I could concentrate on craft wise while we didn't have power (aside for cleaning my craft room). Here's the completed project, but I'll share the "How to" tomorrow. It's time to hit the sack!


August 31, 2008

Haiku Canvas Wall Hanging

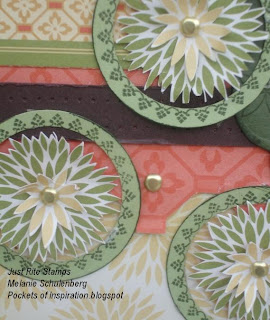
Here's a project I've been working on for the past two days. It's an 8x10 canvas covered with the new SU! Haiku designer paper. Individual images were cut from the paper to create the flowers. JustRite stamps were used to create the circular images around the 3 flowers located near the bottom.

The main canvas was painted with ivory acrylic before I got started. I added Basic Brown ink at the top only after the entire project was assembled (it needed something but not so much as a large image).

The scallops at the top were created using a circle punch and a brass embossing template. The same template was used to create the largets Scallop circle on the left of the canvas.


Here's a close-up of the flower embellishment. Several peices of flowers were cut from the designer paper and edged with chcolate chip ink. It really makes the flower pop.


Here's a close-up of the JustRite images. So sweet.


Now, I'll be away from the computer for a while as this Hurricane comes through. Hopefully I'll get some more stamping done! The rain is just about to begin. Stay safe all my friends in the path of the storm.


Melanie

August 30, 2008

Altered Photo Frame

Here's a photo of an upcoming class I will be offering here in Baton Rouge.


This project is also available via mail with an additional $4.60 priority postage. You receive:
  • Designer paper
  • Photo Frame
  • Ribbon
  • Felt flowers (size and variety vary but the colors remain the same)
  • Rhinestone brads (size may vary)
  • Scallop die cut using Birds and Bloom sizzix die.

Other supplies you will need to complete the project (available for additional purchase):

  • New SU! Scallop edge punch (upper left square of frame)
  • True Friends stamp set (stamped images in upper left and bottom left squares)
  • 1 3/8" circle punch
  • 1 1/4" & 1 3/8" square punch (or your handy paper cutter)
  • Gold Brads
  • Boho Punch

Now, I'm off to prepare for this new hurricane. I really think we should be OK, just hope the power doesn't go out. I've got so many projects I want to complete today!

To all my LA and MS friends....STAY SAFE!

Toodles. ~ Melanie