Showing posts with label hand-made by mel. Show all posts

October 23, 2009

A space to create

Finalized a few projects I have been working on. It was time to get back in gear for Halloween art. First thing on the list, get my work station cleaned.

Here is what it looked like after I cleaned up a bit. It was MUCH worse than this. I have a habit of starting off with a big area to craft and work myself into a teeny, tiny workspace. See that grid sheet in the center of the table? That was the only thing you could see before I took the photo.


Here's what it looked like after. I took all of the 'tidbits' on the table from the upper right corner and threw them into a tin pan. Generally I like to sort it out so I can find it in the future but I was trying to cram in some art time before the kids came home. No time for sorting just yet.

That stack of papers on the upper left-hand side of the table was under the SB paper you see in the photo above.

What happens now? Start making Halloween projects and restock the table with 'stuff', eventually narrowing my work space back down to that one little grid sheet.


Here is Jack, aka "The Beast". He is what keeps me company the entire day. Not that I 'need' the company or want it. He follows me around the entire day; well, most of it, part of the time he's sleeping

When I'm creating, he shows up in the same room and stares out the window. It's worse around 3pm when he knows the kids will be coming home.

Still not sure why the spouse thought we needed yet another thing to take care of. Just something else to clean up after (taking time away from my creating). He is a pretty dog though, and trained if there is 'food' involved, otherwise, he's got free reign to do what he wants to you. Both the boys hit the ground when they see the dog coming, otherwise he'll knock them right over. He's as strong as an ox. Well, strong enough for the 5 yo to ride on his back until I catch him and make him get off.


OK, enough of That Dog. Here's one of the cards I put together whilst waiting for the kiddos to arrive. Two projects developed during this particular stamping hour, but I'll have to wait to share the other b/c the 5yo is in the back crying (his big brother left him alone; he's still in the "scared of being alone" phase).


Have a great weekend everyone!

Melanie

August 27, 2009

A Simple Gesture

A little thing-a-ma-Bobbie I stitched together for someone.....


The textured note card pops inside...with a little "Thank You" note inside.

The idea came after receiving something from Anthropologie last week. A discount card from Anthropologie tucked inside a small linen pouch. They sent it in lieu of my upcoming birthday (September 4th...mark your calendars, LOL).

Here's what their pouch looked like:


Last week was a rough. Ever have one of those days where your list of things to do has items from the previous week on it? The computer is slow. the computer crashes, you're redoing chores that you did not even 30 minutes prior. Then there is peer pressure. Geesh! I thought that was all over with in High School.

The point is, there are days when things are just out of whack. Then something arrives in the mail like this and brightens your day. I know Anthro is a huge store and it was probably made in some sweat shop..who knows. It's the thought that counts. They sent it to me...and it made me happy.

Not an hour later than I opened that envelope did I start pulling it apart the pouch to figure out it's construction. I needed to make one myself. How cute are those threads wrapped around that little board..and those buttons! Cute, Cute, Cute!

Here was my first attempt:


The red embroidery thread was added after the machine sewn stitch across the bottom didn't sew straight (on a scale of 1 - 10 my sewing skills are a -1). Once the red stitches were added I took out the machine sewn thread.

The butterfly up top was a bit easier (the second always is). I've been playing with wire lately and decided to add a little string across the front. The blue beads were confiscated from my daugther's room after sitting in her draw for 2 years (one of the many traits she gets from me).

Who would have thought that such a simple gesture could make such an impact. Now, off to make a few more of these lovlies, maybe something for Fall.

July 30, 2009

Charmingly Spooky

Still having fun playing with From the Crypt stamp set. Here's my latest creations.

A Halloween invite that opens from the front. The black border was created with the eyelet border punch. The elaborate black images were stamped in black craft ink and then embossed with clear EP. They would have really looked better with black flocking.

The spiders are stamped in red and the text around them is from the Batty for You stamp set.


The next project took me 3 days to create. The goal was achieve 3D and texture. Here's how it all came together.

The main shape is the Scallop #2 die cut and was cut on black heavy-weight mat board. The entire piece is then covered with Cast a Spell designer paper from SU!.

The white skull and word "Spooky" are rub-ons from Spooky Treats. The black swatch at the top is velvet-like and cut from a sheet of scrapbook paper I had. Purple dewdrops were created from a glue gun and Misty lavender Pearl Ex. All the extras were just a few things I had laying around : cheesecloth, purple beads and the faux rhinestones.

The word "BOO" was from an old SU! mini alpha set. A few swipes of black acrylic paint and some Twinkling H2O's on top and walla!

LOTS of details in this one! The star and circles (which are covered by the rhinestones) are stenciled from an old metal cookie cutter I purchased years ago at a garage sale. Isn't it great when you can finally use the junk items purchased from all those garage sales?


Here's a close-up of the spider web drawn with a fine tip black marker. Gives it a little extra. The entire piece is finished off with a magnet on the back.


You can find most of the supplies on my demo website.

July 6, 2009

Tulipe die-cut gift bag

Created a little video yesterday. Here's a GREAT idea for getting some use of your Tulipe Bigz die.

Make sure you check out the "promotions" page as there are specials EVERY week in July. This week, the Big Shot Doc's bag is on sale at 30% off. Regularly $69.99 on sale for $49.95.

You'll also want to mark your calendars for this months "Tour de Freaks". Just 14 more days!!! You can view last months submissions HERE.

Now, on to the video. Enjoy.


July 2, 2009

Flutter-by Summer Lantern

What could be more charming for outdoor summer parties than pretty paper lanterns? The light and airy nature of the paper seems to make the heat more tolerable. Add to that the glow of the lantern light which makes it an overall relaxing atmosphere.

Here's a project for those wanting to add a little charm to thier outdoor summer party . A Flutter-by Butterfly paper lantern. Each kit comes with enough supplies to create 3 Flutter-by paper lanterns. You can see the detail of the embossed butterfly by simply selecting the image below. Some simply assembly and you're all set.

Here's a glimpse of what the lantern looks out just before dusk (without the light on).


For those who like a little less flutter, try using only one color ribbon (although you will get both yellow and pink in your kit). Try using the remaining ribbon for decorating your table settings, flower vases, etc.


Don't limit this pretty lantern to outdoor use. These lanterns make great decor for girly bedrooms. What girl doesn't like butterflies and polka-dots?


The Flutterby Butterfly paper lantern kit comes with all you need to assemble 3 paper lanterns.

Cost of each kit is $19.95 (includes S&H). Instructions for assembly included upon purchase. Please note, batteries for lantern are not included.

For purchase, simple select the link below.


June 24, 2009

July 4th Holiday Craft

Here's a little tutorial for creating some colorful red, white and blue paper baskets for your upcoming July 4th holiday! Personally I think they came out A-Dorable!!

This video was so much fun to make. The music has a lot to do with it. It reminds me of old movies where music quartets wore red and white striped jackets singing under a gazebo. Famlies sat on their blankets enjoying their picnic lunches while kids flew their kites. Yeah, those would be some nice summer memories.

Ever wonder how women got through the day in those ankle-length dresses and men in jackets when it was 100 degrees outside? I'm breathing heavy just thinking about it. Think I'll stick to watch'n the movies, LOL! I guess what parasols were for back then.

Enjoy!

Melanie

June 11, 2009

Father's Day paperbag tutorial

Here it is. Sorry for the delay. It took forever to edit. The kids are hounding me to get outside.

This should inspire you to go create one for yourself. It's quick and fun!


Have fun.

Melanie

June 10, 2009

Father's Day paperbag book

Here one of the five creations for the Tour de Freaks Blog Hop on the 20th of this month. However, being that the hop is the 20th and Father's day is the 21st, I thought it would be better to share this now for those who might be interesting in creating one for their Father/Dad. I'll make something different for da Hop!

Make sure you come back for the video tutorial tomorrow (by noon). It'll take some time to put together.


Lat-uh gat-uhs!

Mel

June 8, 2009

Squigglefly Digital Stamps

I came across the darndest website today. SQUIGGLEFLY. Never heard of it before but I was smitten as soon as I saw the adorable images. It's a digital image site, much like digital scrapbooking. Of course, a purchase was necessary to 'try it out'. Below is the first of many creations!

The card uses designer paper from SU!, a Bo Bunny flourish and the text "We're engaged" is from the "Together Forever" stamp set.

Dots around the pink cardstock were used with the Stampin' Write marker in pink. If you want to recreate this, STAZON is a must. The black comes out much richer than a regular dye pad.


Here's a close-up so you can see the glitter and velvet ribbon.


Tour de Freaks is coming up June 20th! I've been working on my samples. Here's a sneak peek.


I smell dinner, burning. Time to go!

June 4, 2009

Decorative Pencil Box

Here's a little something I created as a challenge project for a friend. Think she'll like it? Of course, it works just as well as a paintbrush holder.


Come back tomorrow for sneak peeks in the new 2009-2010 SU! catalog.

June 3, 2009

2009-2010 SU! In Colors

Look at the vivid new Stampin' Up! In Colors for the 2009-2010 Idea Book and Catalog. They're very RICH and very BRIGHT! By Friday I'll be able to see these pretties up close (as long as the mail is on time).


New catalogs will be available for the public July 1st. If you are interested in your very own copy, feel free to select the Buy Now tab below. Catalogs are $6 and sent on a first come first serve basis. All those who purchase the catalog BY JUNE 13TH receive a $5 savings on any of my online tutorials or upcoming workshops during July - August. $5 savings must be redeemed by August 30th.


Now for a little sneak peek of something I created for my friend Janet for a "Anything Goes Challenge". It's off to the post office to make sure it arrives by Friday.


Make sure you sign up to follow me on Twitter. I'll be using that to announce many of my upcoming video tutorials, workshops and events. Be the first to know!


More sneak peeks tomorrow. Until then, keep on craft'n!

Melanie

May 31, 2009

Butterfly Bath Tube

Here's a project the Metairie Stamp Club created last weekend. It's a test-tube filled with Vaseline bath beads (Peach scented). Great gift idea don't cha think?


Basic supplies:
Test-tubes were purchased online.

The idea came from Lori Ruello, a fellow demonstrator. I modified it just a bit to suit my own needs.

Thanks for stopping by.

Melanie

May 28, 2009

Crafting for Everyone

Between printing resumes and filling out applications, I've been taking time to create (so have the children).

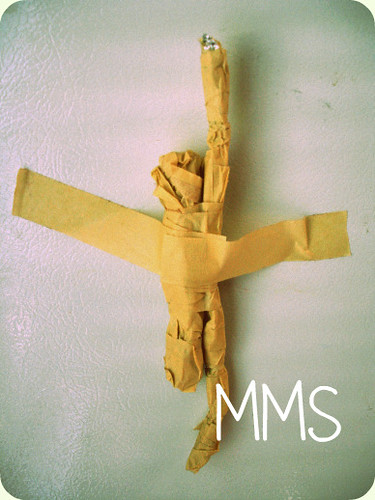
First up, we have "Recession Kid Crafts". Before the Wii, DS, Nintendo and other electronic devices children used their imagination for play. Give them (or in this case, let them take) a few supplies around the house and let them make their own toys.

Here, the children skillful applied aluminum foil and masking take to make "Fridge Art" (which also doubled as weapons two hours prior to the fridge display). Missed the photo of the hand grenade; I think it found it's way over the back fence.


Personally (from a Mother's point of view), this looks just as good as some "quality" sculptures I've seen.

You should also note, aluminum foil can also be used to make wrist/arm-bands to create an "Iron man" effect. Those looking for "Halloween costumes - Recession style", make sure you tell everyone you heard it here first!!! Unfortunately I didn't get a photo before the Iron man child was disassembled.

For all of you wondering what to do with the kids this year (craft-wise), let them loose in the house and see what they come up with. Come back and share your photos! It'll be interesting to see what others can create.

Now, on to the adult crafts. Here's what I've been working on. After months (OK, over a year...many years), I buckled down and created my very own mixed media canvas collage. Acrylics, oils, paper, seed beads and more. It was fun (slightly intimidating). It's not finished, just wanted to share before the final touches.


Inspiration for this came from many, many resources. One that was a real influence was Audrey Eclectic. She does the most BEAUTIFUL work (and luckily 4 of her art pieces reside in my very home).

OK, enough computer time. Must get back to business at hand.

May 25, 2009

Tulipe Vinyl Tutorial

Here's a "Tulipe Vinyl Tutorial" demonstrating the use of vinyl cling with the Tulipe Bigz diecut available from Stampin' Up! ©. The tutorial is a series of photos and narration explaining how the vinyl cling was applied to the "Decorative Fleur Plaque". While the sample shows the vinyl cling applied to wood, glass, cardstock and tiles are just a few more items useful for this application.


"Tulipe Vinyl Tutorial" $5 and is sent in .wmv format.


The "Decorative Fleur Plaque" shown above and below is also available for purchase for those who are interesting in adding a charming plaque to their home or as a gift to your significant other for upcoming father's day. The Decorative Fleur Plaque is available for $12.00 ($3 S&H not included). Each plaque was individually hand-crafted, painted with acrylics, oils, wired and sealed all. The cream colored dots were added one by one achieving an old folk art effect.


Plaque measurements are 5" x 7". There are only 10 plaques availalbe currently. Please remember that each of these are hand-crafted and the colors of the oil paint and acrylics will vary slightly with each (some lighter, some darker) which only adds to their appeal and orginality.


May 24, 2009

Stamp Club Projects

A view of the two projects the Metairie club completed this past weekend. There was another, unfortunately a photo wasn't taken of it (yet).

Tomorrow will be a day of creating (that's what the goal is).


May 19, 2009

Crafting on Canvas

Have you ever made a to-do list that just seemed to grow and grow? Well, there are several lying around here, partly because when an idea hits it's jotted down so it's not forgotten. Problem is, we're so busy with the 'everyday' that doing a to-do list comes second.

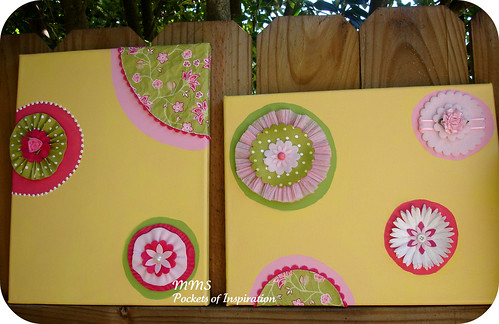
Two weeks ago I was given the boot (laid off). It was bittersweet really, losing a job is never good but at the same time it relieves you of office duties to catch up on things that have gotten away from you (like your ever growing to-do list). Thus began the completion of a baby canvas that was started weeks (OK, months) ago.

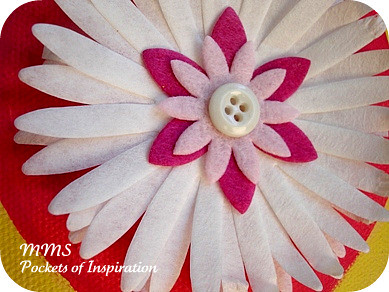
Below is the finish product. It came out nice (I think). Kind of plain really, but the pattern to the baby's room was really simple, so this worked out well. The main canvas was painted with acrylic and then embellished with felt scallops and daisies using dies, fleece, crepe paper, buttons and various odds and ends around the house. This was so much fun to make!


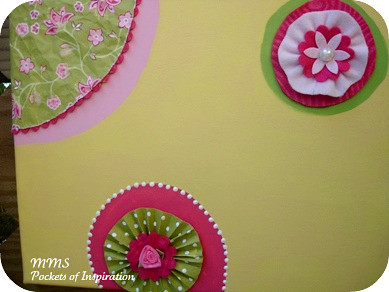
Here's a close-up of one canvas (view the other canvas by selecting this Flickr link or on the right side of this blog).

The left corner of this canvas uses "Raspberry Tart" designer paper by Stampin' Up! It really was the perfect compliment to this piece given the colors being used. The pink flower on the bottom left was originally from my daughters ballerina dress when she was two years old (she's almost 13 now). Just goes to show that all the 'stuff' we gather can be put to use, eventually.


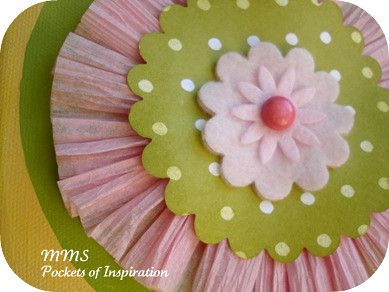
Making this pink crepe ruffle was so much fun! Really gives the canvas some girl frillies.


The daisy below was created using a coffee filter. Yep. Got the idea from Ms. Pam Garrison herself! That lady has some AWESOME ideas. Pam used filters to make a garland, but I thought this was just another great way to utilize them. Using tissue paper to make this flower just didn't seem to keep it as stiff as the coffee filter did; it holds up better.


This little pink fleece add-on was the most difficult. All other embellishments were added to the canvas except for the one light pink spot that remained. Mixing fuchsia and the pink was the first option, 4 days, this was the final decision. The softness is wonderful, kinds of tones down the other loud colors (it is going in a nursery afterall).


So, do you think they'll enjoy it as much as I have creating it?

Here is the final product of the Rubbapalooza Spring Soiree. Everyone seemed to create them easely and in their own style. The daisy-like flower below was made with an everyday household item. Any ideas what it is?? If you guessed Coffee Filter then you're definitely on the creative track. It's simply a layering of mulitple daisies from the die mentioned above. The branches and bird were created with THIS die and the main background was created with a napkin and applying gel medium. The options are endless using a technique like this.


Thanks for taking the time to look. Enjoy your Tuesday.

Melanie

May 15, 2009

Spring Soiree one day away.

Well, the weekend has finally arrived for the Rubbapalooza Spring Soiree. It's taken lots of planning and I'm sure those registered are going to enjoy creating the Blossoms Tapestry awaiting them.

I'm off to take care of the final preparation. First thing is to prepare the fruit tart. Take a look at these juicy blackberries that will add to the yummiest factor of the fresh fruit tart.


Below are a few more sweets for the special event made by yours truly. If you ever wonder why petite fours cost so much at the bakeries, the images below will answer your question. Each one of these cakes must be hand-dipped into fondant. It's quite messy, but product that results is a sweet sensation.

The original desire to create these cakes were for a few friends, but things didn't pan out delivering them so they were saved for tomorrows event. Roses were added (because roses and petite fours just make them more delectable). I kind of went wild wiht the piping and started making crazy designs.

Below you can see my feeble attempt to make a baby head with a small curl on top, but it looks more like a tele-tubby. The dress, well, that's NOT the figure you'll get if you eat more than 6 of these. STAP was supposed to spell "Stamp" but, I jumped ahead and put a "P" instead of an "M". Maybe I should eat this before the event so there aren't questions as to what it means, LOL!


Now it's time to finish bagging goodies and setting up tables. Here's to a fun and creative weekend.

April 19, 2009

Spring Occasions

Hum. Almost 2 months since posting. I'm not giving up on my blog, just tired of fighting the kids for computer time. The husband also decided he likes/needs to spend more time on the computer since he decided to join Facebook.

It was enevitable. Things change over time. I just need to figure out what to do so "I" can get on this box when I need to. The solution I beleive is to get myself a laptop. It's not in the finances right now, but maybe the IDEAL Mother's Day gift, hummmmm.

This past weekend I offered a Spring Occasions workshop at the house. I think all the projects came out nice and each was so different. Here's a sampling of what we did.

The butterfly die cut below took quite a few steps, but the extras really add to the overall card. Three glue dots were applied to the bottom left of the card and sprinkled with glitter.


Embossed butterfly card with the Manhattan Rose impression plate. The yellow and regal rose chalk was applied using a finger dauber.


Below is a matchbox I created using the exclusive SU! matchbox die cut. Wouldn't this die be great for creating advent calendars in the Winter!


In other news. I've signed The Beast up for dog training classes. My goal is to have him come when called and to NOT jump on me when I get home. At the end of the day, I have no energy to support the weight of a 108 lb animal.

There's also the unusal habit of drinking running water from the faucet when someone decides to take a bath, use the John, wash their face or brush their teeth. You walk into the bathroom and he's right on your heels. Sometimes you can walk by the bathroom door and see this:


It's getting late so I'm off to get the wee ones settled so they're up on time with me tomorrow.
Have a great week!
Melanie

February 22, 2009

Crop Celebration workshops

I'm really rev'n up for Crop Celebration next weekend in Hammond, LA. I've been designing for weeks now, working in between the grey box at the office and watching LOST and HEROS. Here's a glimpse into a few of my workshop projects.

Since you've seen the Raspberry Tart Tin Star already, I'm going to skip that and show you some others. If you are interested in any of these classes, sign up early because I am limiting the size of my classes this year.


Urban Garden "Cherish" Plaque
This class is $7. I only have spots for 12 participants (which breaks down to 6 each class).


Sweet, Sweet Spring
What better way to start spring than to send some hand-made notecards to a friend. Class includes each of these 5 notecards along with envelopes. Here are two of the five cards:


Yummy Decor

If you've been wanting to try out the new Decor Elements, now's your chance. Here I've used the pink flower on a plain black frame. Add a few little extras and walla, a great gift for someone (Teacher Appreciation or Mother's Day maybe)?


Hope you've enjoyed this little sneakity-peekity.

February 17, 2009

Raspberry Tart Tin Star

Here's a little sneak peek of the upcoming Raspberry Tart Tin Star workshop I'll be teaching at Crop Celebration.

Sadly, my post will be short due to the fact the Destroyer has broken the mouse on this computer, making it impossible to move images around easily. The wheel seems to be stuck in the scroll function.